Friday, October 4, 2013

Kayli's Chicken Fajitas


This is my Awesome cousin Kayli!  She loves to cook and make up her own recipes.  "I have an amazing recipe for chicken fajitas and it is so easy" says Kayli.  Of course, I am intrigued and I have to try it.  She was right!  Delicious and easy.  This has now become one of our favorite weekday meals.  Thanks Kayli for sharing! 


Kayli's Chicken Fajitas

2 large boneless, chicken breasts- cut into thin strips
1 red bell pepper- cut into thin strips
1 green bell pepper- cut into thin strips
1 yellow bell pepper- cut into thin strips
1 jar of chipotle salsa
flour tortillas
your favorite garnishes- sour cream,
shredded cheddar cheese, sliced olives,
diced tomatoes, chopped avacado

In a large skillet, combine chicken, all the bell peppers, and jar of salsa. Cook on medium heat all together until chicken is no longer pink and peppers are tender.  Drain any extra juices out of the skillet if needed.

Serve in flour tortillas, topped with your favorite garnishes.
I like to have refried beans and chips with salsa on the side with my fajitas. Yum....
Enjoy!  Happy Cooking!

Kayli's Chicken Fajias in the skillet ready to eat!


Friday, September 27, 2013

Homestyle Alabama Chili


I love this time of year!  When the leaves start changing colors and all of a sudden there is a slight chill in the air.  We experienced a little more than “a chill” this morning here in Utah.  Imagine my surprise when I looked out the window and saw snow falling.  Luckily it melted as soon as it hit the ground.  Don’t get me wrong, I love Utah. But snow in September?  You have got to be kidding me!   

On days like this, I love having something that takes me back to enjoying Fall in Alabama!  Today I am sharing my famous Homestyle Alabama Chili.  Make sure to serve it up with JR’s Mexican cornbread or your favorite chips.

For all of my Sand Mountain friends....  Enjoy your beautiful weather!  

Happy Cooking! 


Homestyle Alabama Chili

1 pound lean, ground beef
1/4 cup onion, chopped
2- 15.5 oz. cans chili beans
1- 15 oz. can tomato sauce
1- 10 oz. can original Ro-tel
2- 1.25 oz. envelopes chili seasoning mix
1 Tbsp. chili powder
1/2 cup ketchup
1/2 tsp. unsweetened cocoa powder

In a medium skillet, brown ground beef with chopped onions until no longer pink.

In a large stockpot, combine chili beans (with juice), tomato sauce, Ro-tel(with juice, do not drain), chili seasoning mix, chili powder, ketchup, and cocoa powder.  Mix well.  Add in cooked ground beef into the pot.

Cook on medium heat, stirring frequently for 15 mins.  Reduce heat and simmer on low until ready to serve.

Yummy garnishes- shredded cheese, sour cream, chopped onions and slice jalepenos.

Enjoy! 

Wednesday, September 18, 2013

Savory Beef Roast- Crockpot style


I hope everyone had a fantastic Summer! Fall is in the air and I am excited to cook up some AWESOME Southern fixin's.  

Thought I would start off with one of my favorite “fall” meats- beef roast.  This recipe is my family’s favorite.  I hope y’all enjoy it just as much as we all do!  Make sure you whip up some southern mashed potatoes and gravy to go with it!  Delicious!!!!   

Happy Cooking! 


SAVORY BEEF ROAST- CROCKPOT STYLE

3.5 pound Round Beef Bottom roast
1 cup water
1 cup cooking sherry
1 dry envelope italian dressing mix
1 dry envelope Lipton onion soup mix
1 dry envelope brown gravy mix
large crockpot
cooking spray

In a large skillet, coat with cooking spray.  On medium heat, seer roast making sure to brown on all sides.  Turning roast frequently until all browned.

Place roast in large crockpot.  In a medium bowl, combine water, sherry, italian dressing mix, onion soup mix, and brown gravy mix.  Mix well. Pour liquid mixture over the roast in the crockpot.

Cook roast on high for 1 hour, then turn down to low and cook for 6 to 7 hours.

When serving, slice roast on a platter and pour some of the juices from the crockpot on top of the roast to keep it from drying out.  Use the rest of the juices to make your gravy.

Enjoy! 


Tuesday, May 21, 2013

Page's Ultimate Caesar Salad


Earlier today I was talking with a friend about some of our favorite restaurants and the dishes we love at those restaurants.  My friend mentioned that at a certain restaurant  she really loves their Caesar salad.  YUM!  Do tell....

Caesar salad is definitely one of my favorite salads!  Of course by this afternoon, I had to have a caesar salad...(was getting the craving) but just not any caesar salad would do.  It would have to be a deluxe one.  

Most caesar salads are very simple and sometimes that is exactly what I am in the mood for.  Other times, I like a few extra items...like homemade croutons.  It will be no surprise to my closest family and friends to find out that I am not very keen on chopping up anchovies.  So this is my "no anchovy" caesar salad recipe....

For all of you caesar salad lovers out there!  Enjoy! 


Page’s Ultimate Caesar Salad

5 cloves garlic, minced
1/4 cup olive oil
1 large head romaine lettuce, rinsed then patted dry, and torn into bite-sized pieces
1 small tomato, seeded and chopped
1 can black olives, drained
1/2 cup parmesan cheese, finely shredded
3/4 cup Best Foods mayonnaise
2 tsp. Worcestershire sauce
1 tsp. Dijon mustard
1 tbsp. lemon juice
pinch of salt

Homemade croutons- optional
1 loaf of french bread-cut into cubes
1/2 to 1 tsp. garlic salt, to taste

Heat olive oil in large skillet over medium high heat. Cook minced garlic in oil, stirring constantly until brown.  Remove garlic from pan, leaving the hot oil still in the pan if making homemade croutons. (Discard oil if just using store bought croutons) 
  In large bowl, combine romaine lettuce, tomatoes, olives, and parmesan cheese.  Set aside until ready to add dressing and to serve.

To make dressing:  In medium bowl, combine cooked garlic, mayonnaise, Worcestershire sauce, Dijon mustard, lemon juice, and salt.  Mix well, until creamy.

Pour dressing into large salad bowl with romaine and mix well.  Serve with homemade croutons or use your favorite store bought croutons.

Homemade croutons

Cut a french bread loaf into small cubes.  

Heat the garlic infused olive oil back up on medium heat.  Sprinkle garlic salt into the olive oil, add in bread cubes, and cook until the bread has soaked up all the oil and turns lightly brown.  Remove from heat.

Preheat oven to 375 degrees F.  Spread bread cubes in single layer on a cookie pan.  Bake in preheated oven for 10 minutes.  Take out of oven and let cool.  


Friday, May 10, 2013

Fruit Dessert Pizza


Spring has finally come to Utah!  (I am being very hopeful, especially on the heels of having a snow flurry day last week).  At least today is beautiful and I am feeling Summer coming right around the corner.  On days like today, I am wanting fruit, fruit, and even more fruit!  Of course some fruit with a little dessert is always very tasty.  I decided to share my very easy and very yummy Fruit Dessert Pizza.  I hope you all enjoy this recipe as much as my family does!  

Fruit Dessert Pizza

1 pkg. sugar cookie dough, bought at store
8 oz. pkg. cream cheese, softened
1/4 cup powdered sugar
1 small container marshmallow cream
1 tsp. lemon juice
your favorite cut up fruit- ex: strawberries, kiwi, blackberries, raspberries, blueberries, peaches, pineapple, grapes

Preheat oven to 350 degrees F.

Flatten sugar cookie dough onto a pizza pan, or a cookie baking sheet.

Bake dough in preheated oven for specified time listed on cookie dough package- approx. 10 to 12 mins, let cool completely.

In a mixing bowl, combine cream cheese, powdered sugar, marshmallow cream, and lemon juice.  Mix well, until creamy.

Spread cream cheese mixture evenly on top of baked cookie.  Decorate with cut up fruit.  

Slice and serve immediately.  Your guests will love you and never know how easy this delicious recipe was to make!  

Enjoy!

Saturday, May 4, 2013

Page's Chocolate Chip Delights


I love Chocolate chip cookies.  Add in the oatmeal and I am absolutely in heaven!  Here is a little twist to the traditional Oatmeal Chocolate Chip cookies.  Make sure you have a large glass of ice cold milk to enjoy with these delicious delights!  Yum!  

Page's Chocolate Chip Delights

1 cup butter, softened
1 cup light brown sugar
1/2 cup white sugar
2 eggs
2 tsp. vanilla extract
1 1/2 cups self-rising flour
3 cups Old fashioned oats
1 1/2 cups semi-sweet chocolate chips
toffee bits
milk chocolate chips

Preheat oven to 325 degrees F.

In large mixing bowl, add in butter, brown sugar, white sugar and eggs.  Beat until creamy, then stir in vanilla extract. 

In a blender, pour in the 3 cups of oats.  Blend on low speed until oats are a fine powder.  

In a smaller mixing bowl, combine self-rising flour and oats.  Mix into the creamed mixture until thoroughly blended.  Drop by heaping tablespoons onto an ungreased baking sheet.

Sprinkle toffee bits on top of each cookie.  Bake in preheated oven for 11 to 12 minutes.  As soon as the cookies come out of the oven, sprinkle each cookie with the milk chocolate chips.  Allow the cookies to cool on the baking dish for about 5 minutes, then transfer them to a wire rack to finish cooling.  

Makes about 2 1/2 dozen

Friday, April 19, 2013

Yummy Sausage Balls

Cheesy Sausage Balls

Here is a new twist on an old favorite! Bring these to your next party and your friends will love you!  

Cheesy Sausage Balls

1-16 oz. hot, breakfast sausage
2 cloves garlic, minced
1 cup Bisquick mix
2 cups shredded cheddar/jack cheese
1 cup shredded sharp cheddar cheese
1 tsp. garlic salt
3 Tbsp. milk
cooking spray

Preheat oven to 400 degrees F.

In a medium skillet, spray with cooking spray, add in garlic and sausage.  Scramble up sausage and cook until no longer pink.  Drain sausage on paper towel lined plate.  

In a large bowl, combine sausage and all other ingredients.  Mix well.  

Form into walnut size balls with fingers.  Place balls on ungreased cookie sheet.

Bake in preheated oven for 10 to 12 minutes until golden brown.  

These are delicious served plain, with mustard, or with ranch dressing.


Tuesday, April 2, 2013

I love Spring!


My Easter Centerpieces

I love Spring! And even though it has not quite "blossomed" here in Utah yet, I decided for Easter this year it was time to bring Spring inside!  This was my first time making these arrangements and I love them!  They are beautiful, easy to do, and smell wonderful!  

All you need is a glass hurricane or vase.
A bunch of your favorite flowers
fruit slices
water

Make your own version!  You will love it!  Happy Spring!  


Tuesday, March 26, 2013

The Secret is now available


So excited about my close friend Taryn A. Taylor's release of her new book, "The Secret".  It is such a great read, filled with lots of twists and turns, keeping you in suspense until the very end.  Check it out! You will love it!  


New Release! THE SECRET by Taryn A. Taylor
A Young Adult, Modern Fantasy/Paranormal tale, with a touch of Romance!
Seventeen-year-old Delanie Hart has a past she wants to keep hidden.  Moving to a new state and attending a new high school seems to be just the thing - until she accidentally sees a mark exactly like her own.  When the people she is running from come after her, Lanie is left with a choice - give up what she wants or save her friends. 
or


About Author:
Taryn A. Taylor grew up moving from small town to small town every few years.  This helped her gain an appreciation for good books, loyal friends, and the fact that a home is a lot more than a house - it's the people that love you.  After receiving a B.A. in English and an M.A. in Communications, she finally began putting all of her stories down on paper, finding it most helpful to eat chocolate during this process. In between raising four amazing boys she loves to go on dates with her husband and watch movies late into the night.

Find Taryn at:
Blog link: 
http://www.taryntaylor.blogspot.com
Twitter: @tarynataylor

Sunday, March 17, 2013

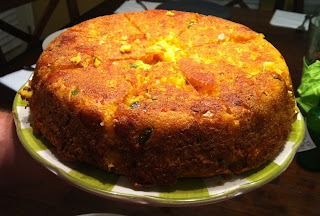
JR's Mexican Cornbread


My brother Robert is in the Navy and got to come visit us in Utah for a few days before going to “C” school in California.  The night before he was flying out, we decided to make our traditional southern “home cooked, stick to your ribs, comfort” food.  The menu included Dad’s pinto beans, Deluxe Mac and cheese, collard greens, Mom’s chicken fingers, and JR’s Mexican Cornbread.  So yummy!  Whoever says food does not bring comfort has never had JR’s Mexican Cornbread.  This cornbread was created by my dad and later perfected by my brother Rob!  Dad would be proud!  Enjoy! 

JR's Mexican Cornbread, Mom's chicken fingers, Dad's pinto beans, and collard greens


JR’s Mexican cornbread

3 tbsp. butter
1/4 cup finely chopped, pickled Jalepeno nacho slices
1/2 cup finely chopped onion
1/4 cup finely chopped red bell pepper
2 cloves minced garlic
2 cups yellow corn meal
1 tsp. salt
1 1/2 tbsp. baking powder
2 1/2 cups buttermilk
2 cups shredded cheddar/jack cheese
3 eggs
1/3 and 1/4 cup olive oil (or your favorite cooking oil), separated
2 cups cubed sharp cheddar cheese

Preheat oven to 425 degrees F.  
In a medium skillet, melt butter, then add chopped jalepeno slices, onion, chopped red pepper, and minced garlic.  Saute on medium heat until veggies are soft.  Set aside for later.

In a large bowl, combine corn meal, salt, baking powder, buttermilk, cheddar/jack cheese, eggs, and 1/3 cup oil.  Mix well. Then add the cubed cheddar cheese and sauted veggies.  Stir until mixed completely.

In a cast iron skillet, add in the remaining 1/4 cup of oil.  Heat on top of stove on medium high heat until skillet barely starts to smoke.  Pour cornbread batter into cast iron skillet but do not stir batter into the oil.  Just pour on top of the oil.

Bake in preheated oven for 35 to 40 minutes, or until top is golden.  
Serves 10

Robert and Christine


Tuesday, February 26, 2013

Momaw knows best!


My mom and all her sisters have some of the prettiest skin.  Of course my momaw always did as well. (My momaw was beautiful on the inside and the outside.) When I was younger, I was never too concerned with wrinkles or trying to keep my skin "pretty."  Lots of hiking and sun bathing without sunscreen was definitely my normal. Now that I am in my late 30's, having great skin has definitely become a lot more of a priority!  So what it the secret of great facial skin? Well, my momaw passed down some of her home remedies that I live by these days!  Thanks to my moma for sharing them with us and now I am going to share them with you.  You will love the way your skin looks and feels!


Facial Scrub- I do this 1 to 2 times a week

1 tbsp. olive oil

2 tsp. granulated sugar

In a small bowl combine olive oil and sugar, mix well.  With your hands lightly rub the scrub in your face, making sure to cover your entire face and neck.  Rinse off with warm water and pat dry with a towel.  Such a great exfoliate!


This is the facial scrub


Firming Liquid- I do this about 1 to 2 times a week,(mostly just once a week)

1 egg white


Crack egg white in bowl and throw away yolk.  With fingers spread egg white all over face and neck.  Keep layering egg white until you have a really good amount on your skin.  Let egg white dry and you will feel it firming as it is drying.  Leave on after it is dried for about 6 to 10 minutes.  Wash thoroughly with warm water.   Pat face dry with a towel.


Beautiful Ladies


My momaw Willene, and her mom Ada

My sister Jennifer and my mom Sandra


Thursday, February 21, 2013

Grilled Steak Fajitas, Oh Yeah!


When I visit the great state of Texas, one of my favorite restaurants is called Pappasitos Cantina!  Yum!  They have the best steak fajitas!  If you are ever in Texas, you need to check them out. You will not be disappointed! 

Since I live no where near Texas these days,  I decided for my family's Valentine dinner this year it was time for me to make my own steak fajitas that may be able to rival that of the great Pappasitos!  First, I googled their steak fajita marinade recipe and got lots of different ideas of “great” recipes.  I also talked with my brother Robert, who is a master chef, and finally came up with the my own perfect marinade! (at least I was hopeful it would be perfect).

One of the big changes I made was to add Sprite to my marinade.  It turned out AMAZING!  So give it a try and let me know how you like them!  Enjoy! 


GRILLED STEAK FAJITAS

Marinaded steak
1 large yellow or sweet onion, sliced thin
1 large green bell pepper. sliced thin
1 large yellow bell pepper, sliced thin
8 to 12 flour, tortillas, warmed up
shredded cheese, salsa, guacamole, shredded lettuce, tomatoes, sour cream, and sliced olives, as sides (optional, according to your tastes) 

Steak Fajitas marinade
1 1/2 to 2 pounds of skirt steak
1 cup soy sauce
1 cup pineapple juice
1 cup sprite
1/2 cup water
1 tbsp. olive oil
1/2 tsp. ground ginger
1/2 tsp. onion powder
1/2 tsp. garlic powder
1/4 tsp. black pepper

Tenderize meat by pounding it with a meat mallet on both sides.  Mix together marinade and add meat to the marinade.  Let meat stay in marinade, in the fridge overnight.  Get the marinaded steak out of the fridge and let sit at room temperature for 1 hour before grilling.  Remove steak from marinade.
While the steak is sitting out a room temperature, get your veggies ready.  Spray an electric griddle or an iron skillet with cooking spray.  Stir-fry veggies over high heat until a little charred and softened but not mushy.  Keep warm until steak is finished grilling.  

Grill steak over high heat until medium rare to medium, about 2 to 3 minutes per side.  Slice the meat against the grain into thin strips.  

Add sliced meat to the veggies and serve immediately with the tortillas and all your favorite sides.
I like to make sure to have chips and salsa on the table to eat with my yummy fajitas!  
Serves 6 to 8


Wednesday, February 13, 2013

The Style Sisters: Pink and Brown Tablescape - Centerpiece Wednesday

The Style Sisters: Pink and Brown Tablescape - Centerpiece Wednesday

Valentine's Day treat


It is Valentine's day this thursday, and I am sure all of us are thinking about that wonderful, "delish" dessert we can make for our special someone!  Over the years, my Valentine desserts have ranged from simple to very elaborate.  I have finally discovered that my man (and my girls) really enjoy the simple dessert the best!  Especially my Deluxe Brownie Sundae!  I hope you enjoy it as much as we do!  Happy Valentine's Day!  

 Deluxe Brownie Sundae

1 2/3 cups sugar
1 1/2 sticks butter, melted
2 tbsp. water
2 large eggs, at room temperature
2 tsp. vanilla 
1 1/3 cup all-purpose flour
1/2 tsp. baking powder
1/4 tsp. salt
3/4 cup Hershey’s unsweetened baking cocoa
1 1/2 cups semi-sweet chocolate chips
vanilla ice cream
chopped pecans
caramel ice cream topping

Preheat oven to 350 degrees F.

Spray a 9x13 in. casserole dish with cooking spray.

In a medium bowl, mix in sugar, melted butter, and water.  Stir well, add in eggs and vanilla.

In a separate bowl, mix in all-purpose flour, baking powder, salt, and cocoa.  Mix this into the sugar/butter mixture.  

Spread into prepared dish.  Sprinkle chocolate chips on top of brownie mixture but do not stir into the brownies.

Bake for 20 to 27 minutes.  

Once brownies are done and mostly cooled, cut into 24 squares.  Serve each square  with scoops of vanilla ice cream, pecans, and drizzle caramel sauce on top! Yummy!  


Thursday, February 7, 2013

Sweet Potato Cupcakes

My beautiful sis-in-law Christine with her yummy Sweet Potato Cupcakes
I had my new Sis-in-law over on Sunday to watch the Super Bowl.  I had asked her if she could bring a dessert to go with all of the other yummy food we were having.  When she got here and I asked what she had brought, she said, "Sweet Potato Cupcakes"!  Sweet Potato what?  

Confession time:  Even though I grew up in the great state of Alabama and am Southern to the core I have never been very fond of sweet potatoes!  Growing up, my Mom made sweet potatoes on a regular basis and I always tolerated the few bites, I of course was required to eat.  (I am from the clean your plate generation)  It has only been the last several years that I have started to enjoy sweet potatoes.  I now feel I have started a "love affair" with them and really enjoy them no matter how they are made!  

Christine was reluctant to share her decadent recipe with the world and I have to understand that...  but Dang it!  They were SO good!  If you happen to have a favorite sweet potato recipe you think I should try please share it!  I would love to taste your favorite!  :-) 

Christine is so talented!  Check out some of her AWESOME creations!  Way to go girlie!  

Emma's Hunger Games B'day cake made by Christine

Monster cake
Mickey Mouse cake and cupcakes

Wednesday, January 30, 2013

Page's Baked Potato Soup


Looking out the window this morning to another snowy, winter day here in Utah, I decided I would really LOVE some down home southern comfort food.  Nothing describes the ultimate comfort like a warm, cheesy bowl of soup.  That's why I decided it was time to share my Baked Potato soup recipe!  I know what my family is having for dinner tonight, how about you?

Page’s Baked Potato soup

5 large baking potatoes
pinch of salt
1 cup Best Foods or Hellman’s mayonnaise
1-12 oz. can of Evaporated milk
1 1/2 sticks butter
1 tsp. salt
1/4 tsp. black pepper
2 1/2 cups shredded, cheddar/jack cheese, separated
1/2 cup milk
1/2 cup cooked crumbled bacon
chives
sour cream

In large stockpot, fill 3/4 of the way full.  Add a pinch of salt and cook water on medium high heat until boiling.  While water is heating up, prepare your potatoes.  Peel, and wash potatoes.  Cut into thin slices.  

Add cut potatoes slices to the boiling water.  Boil potatoes for 25 minutes until tender.  Drain potatoes in a strainer and then put potatoes back in large stockpot.  Add in the sticks of butter and let butter melt while you mash the potatoes very well.  After potatoes are well mashed, pour in 1 can of evaporated milk, let simmer on low heat, stirring frequently for about 5 minutes.  Stir in mayonnaise, salt, pepper, 2 cups shredded cheese (reserving the 1/2 cup cheese for later), milk, and bacon.  Continue to simmer, stirring frequently for 10 more minutes.  

Serve in bowls, sprinkling with remainder shredded cheese on each bowl.  Garnish with sour cream, and chives.  
Serves 8 to 10


Tuesday, January 22, 2013

Sassy Sausage Dip, Stars, & Quesadillas? Yes, please!

Sassy Sausage dip has been a huge favorite of my girls for many years.   It has been so much fun experimented and trying "new" ways to eat this yummy filling!  I hope you enjoy these as much as we do!  
Sassy Sausage Dip

Sassy Sausage Dip

16 oz. hot pork sausage, (or mild sausage if you do not like too much spice)
1 cup prepared ranch dressing
1/2 cup finely chopped red pepper
2.25 oz. can ripe sliced olives, drained of all juices
2 1/2 cups shredded cheddar/jack cheese

Cook sausage in skillet on medium-high temperature until no longer pink.  Drain very well and set aside to cool.  
In a large mixing bowl, combine sausage, ranch dressing, red pepper, olives, and cheese.

Preheat oven to 350 degrees F.  Lightly spray an 8 X 9 inch casserole dish with Olive oil cooking spray.  Spread sausage mixture out into pan until evenly distributed.  

Bake in preheated oven for 30 minutes or until bubbly in middle.  If needed, blot top of dip with paper towels to soak up any excess grease before serving.

Serve with tortilla chips
Serves 12 to 15

Sassy Sausage Stars
Sassy Sausage Stars


16 oz. hot pork sausage, (or mild sausage if you do not like too much spice)cooked, crumbled, and drained
1 cup prepared ranch dressing
1/2 cup finely chopped red pepper
2.25 oz. can ripe sliced olives, drained of all juices
2 1/2 cups shredded cheddar/jack cheese

1 package of wonton wrappers
cooking spray

Preheat oven to 350 degrees F

In a large bowl, mix together cooked sausage, cheese, ranch dressing, olives, and red pepper.

Lightly spray a mini muffin pan with cooking spray.  Place one wonton wrapper in each muffin cup, shaping the wrapper to look like a star.  Lightly spray shaped stars with cooking spray.

Bake wrappers in preheated oven for 5 minutes.

Remove from muffin tins, and place in cookie sheet.  Fill with sausage mixture and bake for 5 more minutes.  Serve!  
Sassy Sausage Quesadillas

Sassy Sausage Quesadillas 

10 to 12 Medium flour tortillas
Sassy Sausage Dip Mixture

Preheat non-stick skillet or electric griddle to medium high heat.  Spray with Olive oil cooking spray.  Spread  approximately 2/3 cup of sausage mixture onto one tortilla and top with second tortilla.  Place on griddle/skillet for 3 to 4 minutes until bottom tortilla is getting slightly golden and crisp.  Turn quesadilla over cooking the other side until it is getting golden and crisp.  Remove from heat, and cut with pizza cutter into triangles and serve!

Garnish with sour cream, salsa, guacamole, or even an avacado.  Serve while warm!
Serves 5 to 6